Maximize Produce Freshness: A 4-Step Visual Storage Guide
Every trip to the grocery store starts with good intentions: a cart full of vibrant fruits and crisp vegetables, promising healthy meals for days. Yet, how often do you find yourself tossing out wilted greens or soft berries just a few days later? Food waste is a frustrating reality for many households, costing money and contributing to environmental concerns.
But what if there was an approach to food storage that, at first glance, seemed unusual but delivered dramatically longer produce life? We're talking about a simple, visually-driven method that can double the freshness of many common fruits and vegetables. It's not a complex gadget or an expensive preservation system; it's a strategic use of everyday items combined with an understanding of how produce breathes and ages.
Every trip to the grocery store starts with good intentions: a cart full of vibrant fruits and crisp vegetables, promising healthy meals for days.
The Unconventional Path to Extended Freshness
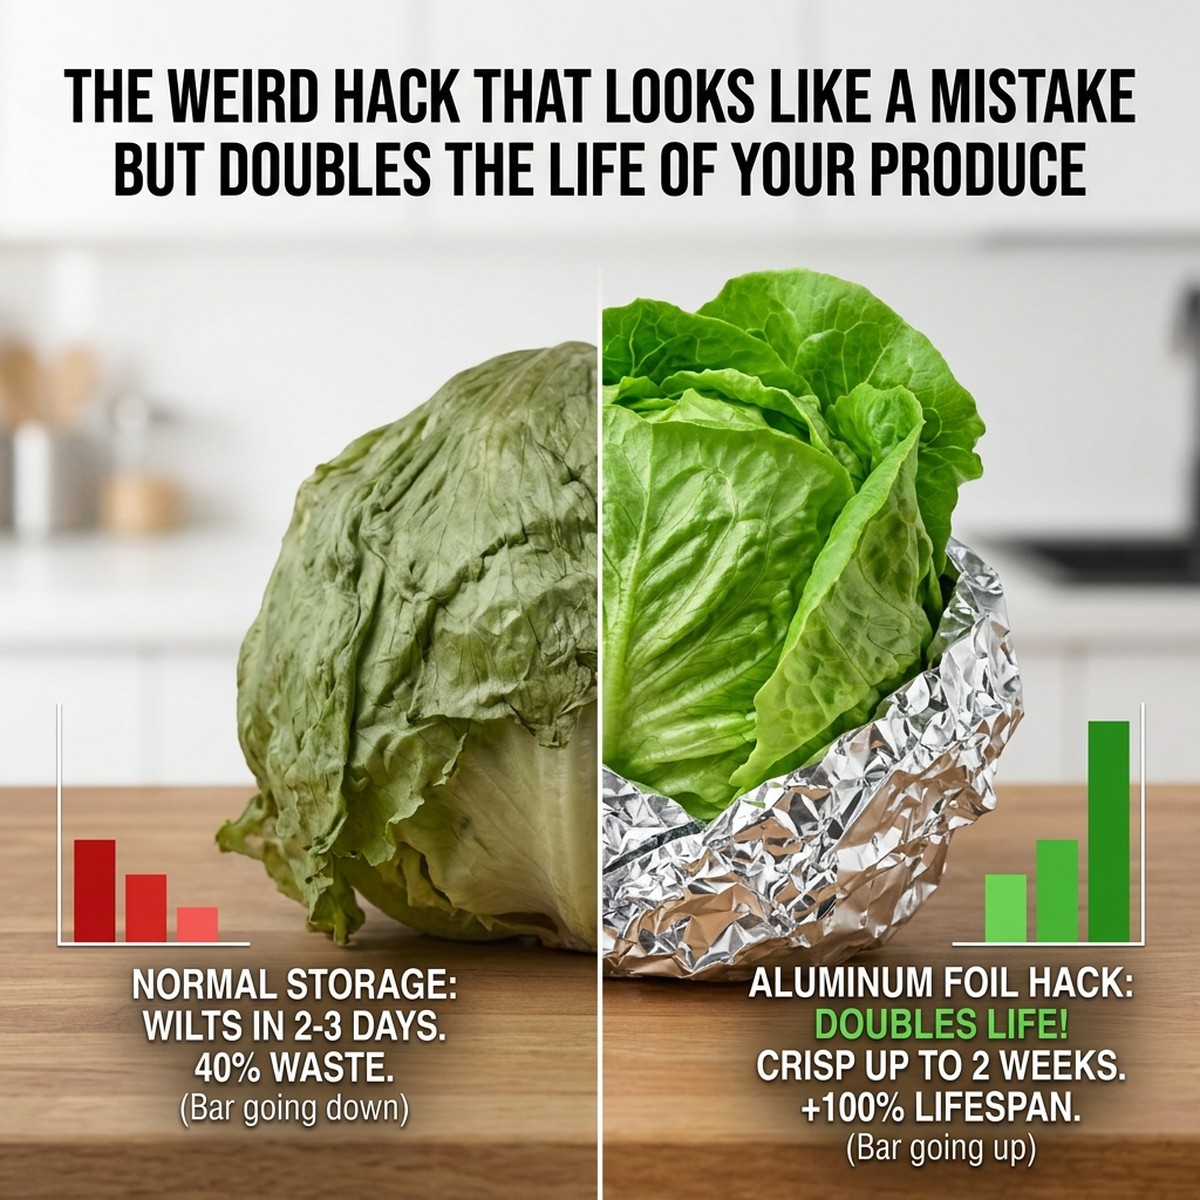
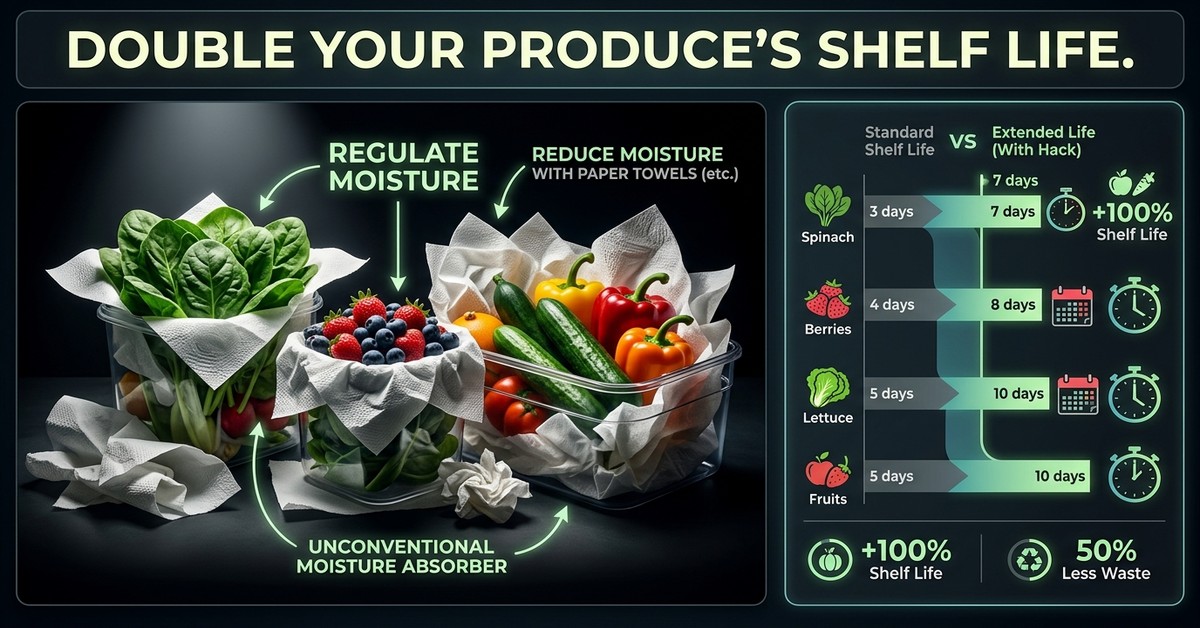
This method, which some might initially mistake for an overly cautious or even counterproductive approach, focuses on controlling the micro-environment around your produce. It leverages a combination of humidity regulation and minimal air exposure to slow down the natural ripening and decay processes. The visual cues you’ll learn to look for will confirm its effectiveness, turning fresh food preservation into an almost intuitive art.
Step 1: The Initial Visual Assessment & Dryness
- Before storing, ensure your produce is completely dry. Any surface moisture can accelerate spoilage. This might involve gently patting items like leafy greens or herbs with a clean paper towel.
- Visually inspect for any blemishes or soft spots. Remove these portions, as they can quickly spread decay to the rest of the item.
Step 2: Strategic Wrapping & Containment
- For many items, especially greens, herbs, and certain vegetables, wrap them snugly but not overly tightly in a dry paper towel. This might look like you're 'suffocating' them, but the paper towel absorbs excess moisture while still allowing minimal respiration.
- Place the paper-towel-wrapped produce inside an airtight container or a reusable silicone bag. This creates a localized, stable humidity environment.
Step 3: Optimized Placement & Temperature
- Store items like leafy greens, broccoli, and carrots in the crisper drawer of your refrigerator, ideally in separate drawers if you have them, with humidity settings adjusted appropriately (high for leafy greens, low for fruits like apples).
- Certain items, like tomatoes and potatoes, are best stored at room temperature, but even for these, specific visual methods (e.g., storing potatoes in a dark, cool place away from onions) can extend their life significantly.
Step 4: Monitoring for Visual Cues & Adjustment
- Periodically check your stored produce. The visual cue of a slightly damp paper towel indicates it’s doing its job by absorbing excess moisture. If the paper towel becomes saturated, replace it.
- Observe the produce itself. It should remain firm, vibrant, and free from sliminess or wilting for weeks beyond its typical shelf life. This sustained fresh appearance is your direct evidence of the method's success.
According to experts at the USDA, controlling temperature and humidity are paramount for extending the shelf life of fresh produce. This specific method operationalizes those principles using everyday materials. Furthermore, culinary resources like those often shared by Good Housekeeping frequently highlight similar 'unconventional' yet highly effective home preservation strategies that prioritize observation and simple material use.
By implementing these four steps, you’ll not only reduce your food waste significantly but also enjoy fresher, more vibrant ingredients in your cooking for much longer. It’s a testament to how a small, seemingly odd adjustment can lead to major benefits in your kitchen.